Home › Forums › Windstone Editions › Repairs › Peacock Male Repair Picture Tutorial (IMAGE HEAVY)
- This topic has 52 replies, 28 voices, and was last updated 6 years, 5 months ago by drag0nfeathers.
-
AuthorPosts
-
March 18, 2009 at 11:37 pm #757123
Okay so if anyone traversed this thread…
http://www.windstoneeditions.com/forums/viewtopic.php?f=18&t=10034
You’ll see I purchased a badly damaged Peacock Male dragon from Tinks (who is an AMAZING packager by the way!) I’ve never had a dragon packaged so well, nevermind a broken one! LOL!
So anyway, I decided to take step by step pictures of the repair in the case anybody out there may want to try and repair their own dragons in the future. I may paint pretty well, but in no way have I ever sculpted before, so if I can do it I’m sure you can too 😀 Granted, it’s not as professional as Kyrin’s repairs, and since I am self taught it may not necessarily be the best way to do this. It’s just the way I do it.
The materials I use, that you will need…
Loctite Super Glue Gel
Apoxie Sculpt Part A ( I use white)
Apoxie Sculpt Part 2
A simple set of basic sculpting tools (metal & rubber/plastic) I got mine at Joanne Fabrics &/or Micheal’s
A small bowl of water
A medium soft, flat paintbrush
Black acrylic paint (since this is a peacock dragon and black paint is the base for them)
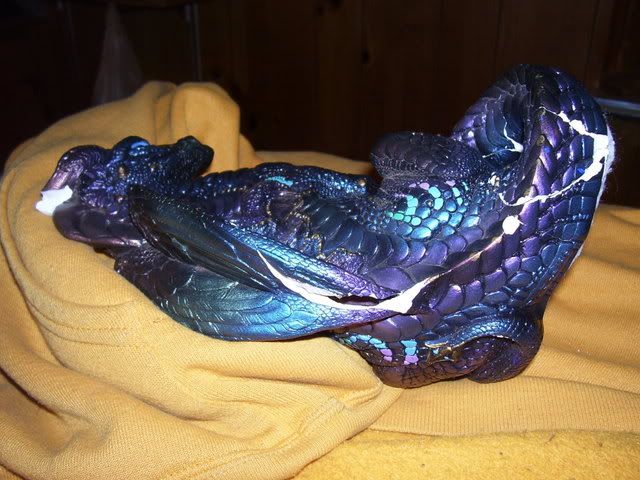
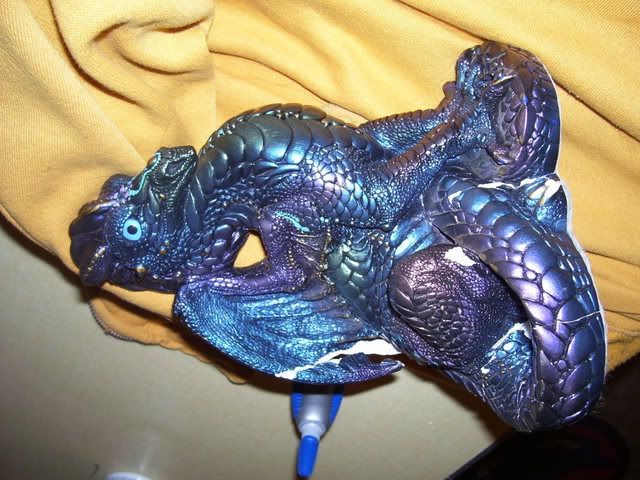
light grit sandpaperSo here we have a few views of out broken dragon to see what we have to work with… ouchies, poor guy.
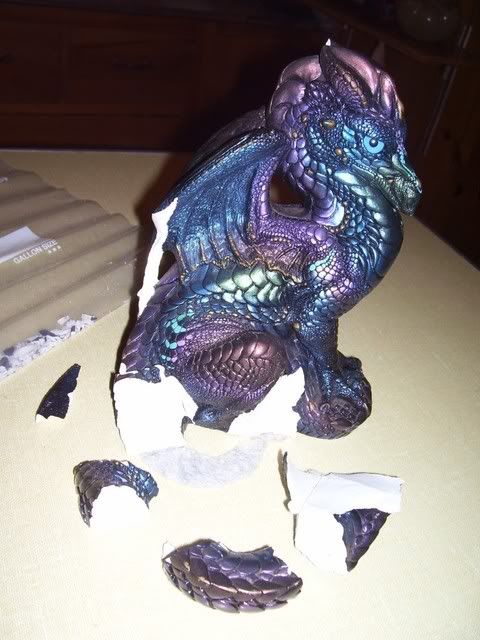
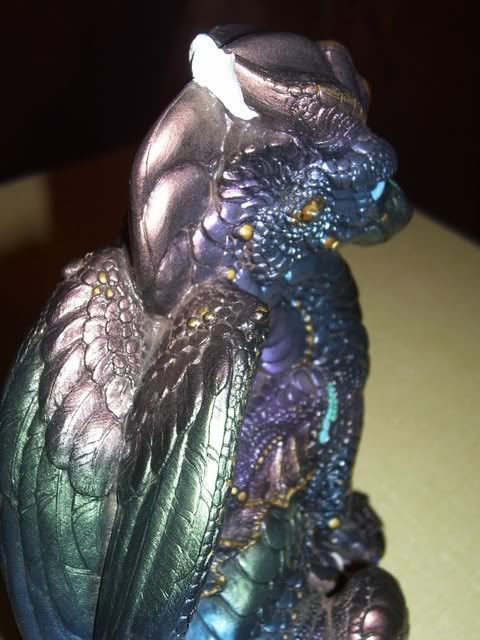
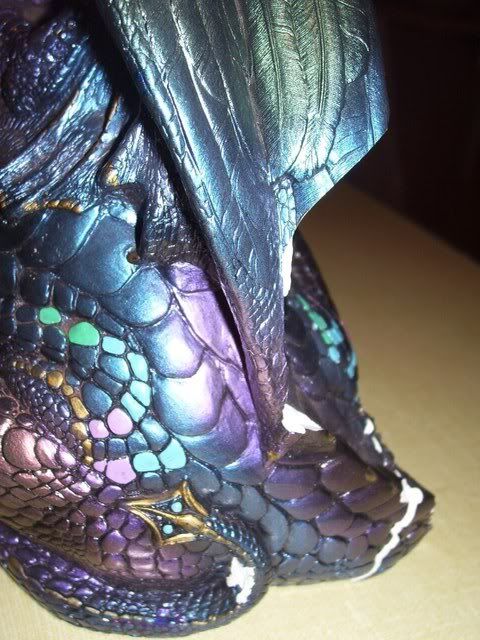
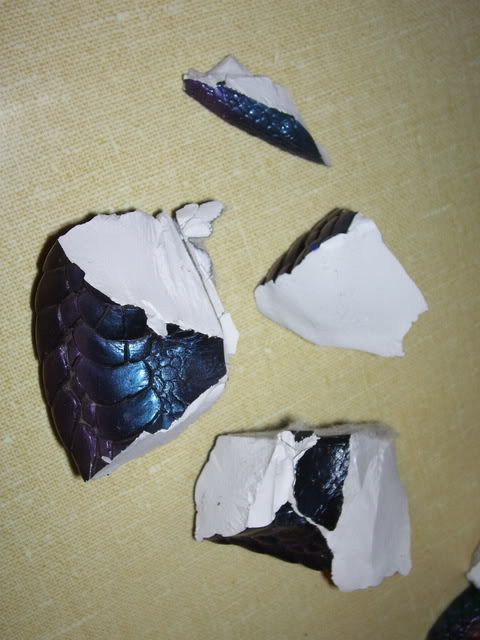
Here are the larger pieces I have to work with. There was a baggie of really small pieces which, though they are nice to have with smaller repairs, they usually aren’t very useful and as a rule with these big ones, so I don’t really bother with them. No matter how many little bits you have you’re still going to have to repaint the whole area ( at least I have to since I mix my own paint and if you only paint sections and now the whole area, your color will appear “patchy” looking ) Also, when you reattach your pieces they almost NEVER fit back together perfectly. I use Loctite Super Glue Gel( sort of like Krazy Glue, but not as watery) and even though it doesn’t seem to add much thickness to the pieces being glues it DOES, and you end up with uneven surfaces where the small chips were reattached. This is my observation anyway.
So now we will make sure everything fits okay…
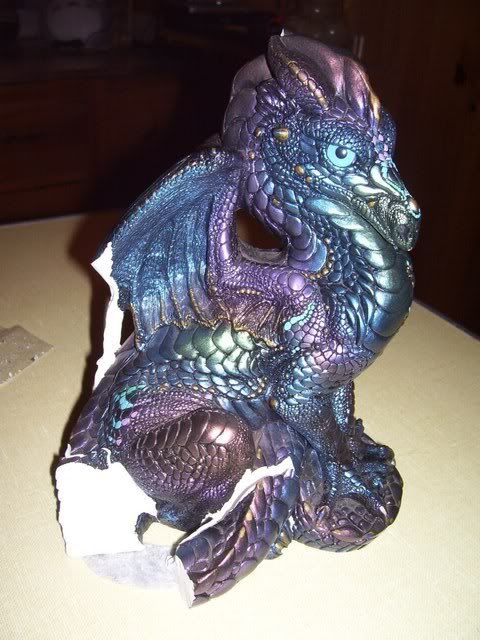
one…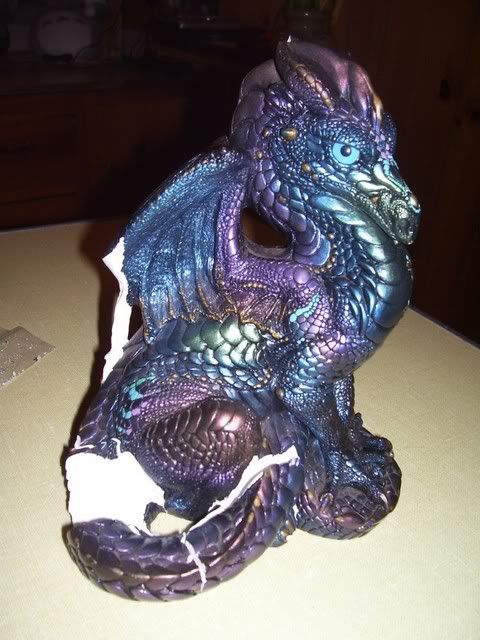
two…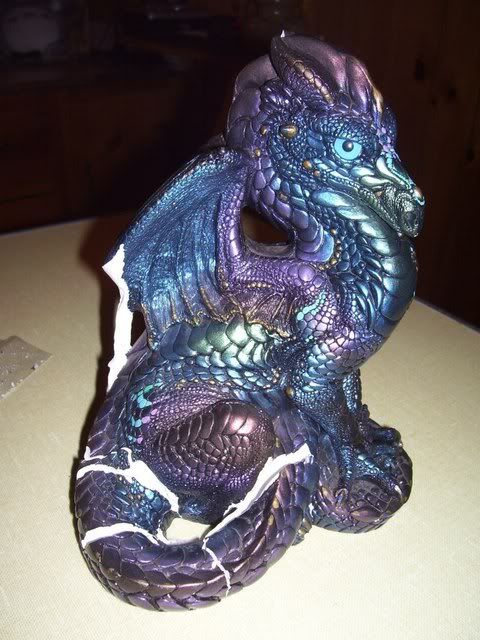
three…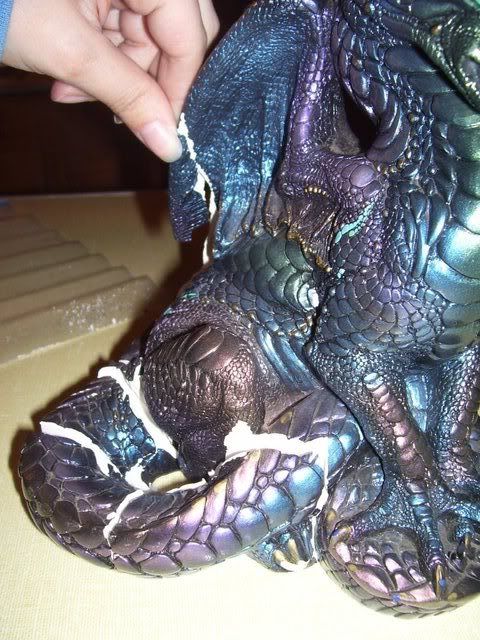
and four…make sure everything will fit well. Check a few times and remember where everything will go, as you will need to work fast and once you start using this glue you WON’T be able to get the pieces back of again without re breaking the sculpture.
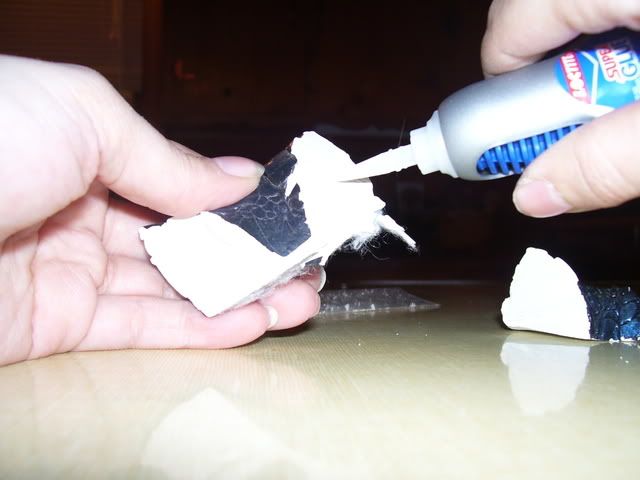
Start gluing, you won’t need much! I love this stuff! Try and stay away from the edges if you can help it, so when you attach the pieces you don’t have any overflow coming from the seams/cracks. This stuff is STICKY!!!
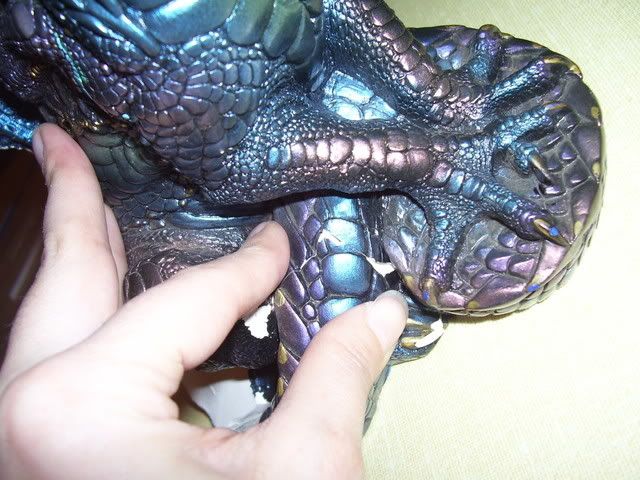
Hold the pieces firmly and run your fingers over the seams to make sure you have a smooth surface showing the piece are reattached appropriately ( be aware you will have yucky glue stuck to you if you have glue coming from the seams) The glue will set very quickly.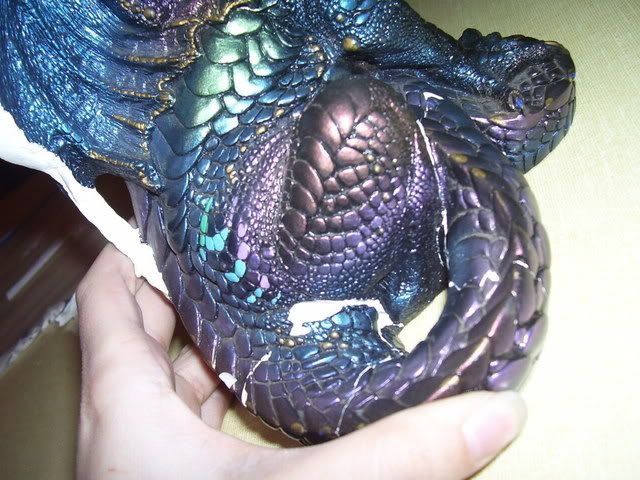
Once you get all the pieces together to your satisfaction hold everything together firmly for a good minute or so until you are sure you have a good hold.
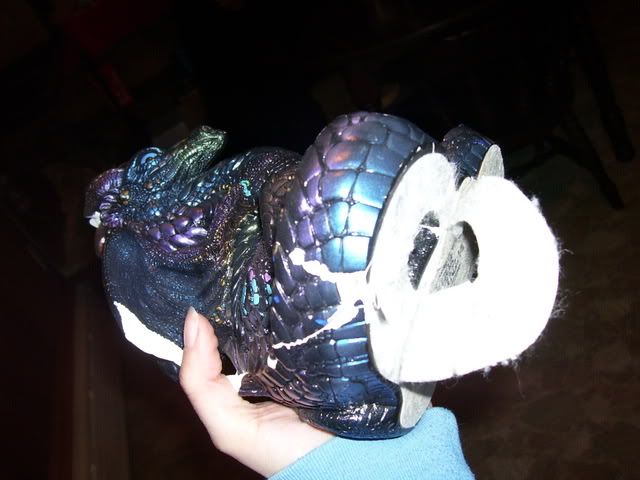
You can reattach the felt pad later with double sided tape, a glue stick or some other adhesive of your choice. Just nothing too watery because it will soak through the felt instantly and stain. Check over your work and let it dry thoroughly for a few minutes. Let’s see what we have to work with now that all the pieces are back on our dragon…
Okay then! Now it’s time for the fun part! 😉 Onto the next post! Please be patient 😀
Got a busted Windstone?
drag0nfeathersdesign@gmail.com
*OPEN for repairs**SEEKING GRAILS*
Arc-en-ciel Emperor
Siphlophis Male Dragon
Calypso Hatching Empress
Ivory Moss Sitting Baby Kirin
Tattoo Mother Kirin
Emerald Tabby Male Griffin
Tie Dye + Orion Hatching Royalty
Indigo Rockfish + Flame Tabby Little Rock Dragons
Dragon Quail + Obsidian Frost Old Warriors
Betta Sun Dragon + Male Dragon
Dreamscape, Orion, Poison Dart, Fireberry, Spangler + Tigerberry DragonsMarch 18, 2009 at 11:37 pm #497821Got a busted Windstone?
drag0nfeathersdesign@gmail.com
*OPEN for repairs**SEEKING GRAILS*
Arc-en-ciel Emperor
Siphlophis Male Dragon
Calypso Hatching Empress
Ivory Moss Sitting Baby Kirin
Tattoo Mother Kirin
Emerald Tabby Male Griffin
Tie Dye + Orion Hatching Royalty
Indigo Rockfish + Flame Tabby Little Rock Dragons
Dragon Quail + Obsidian Frost Old Warriors
Betta Sun Dragon + Male Dragon
Dreamscape, Orion, Poison Dart, Fireberry, Spangler + Tigerberry DragonsMarch 19, 2009 at 12:10 am #757124Okay, so if you have never used Apoxie Sculpt I highly recommend it for these repairs! It’s AMAZING stuff! You can find it at a few websites, but I bought mine on ebay. (big surprise)
Here are the tools I will need now, plus a soft flat paint brush I forgot put in the picture… oops… 😳 Oh! and a very light grit sandpaper may be useful later on as well! You’ll only need a tiny piece.
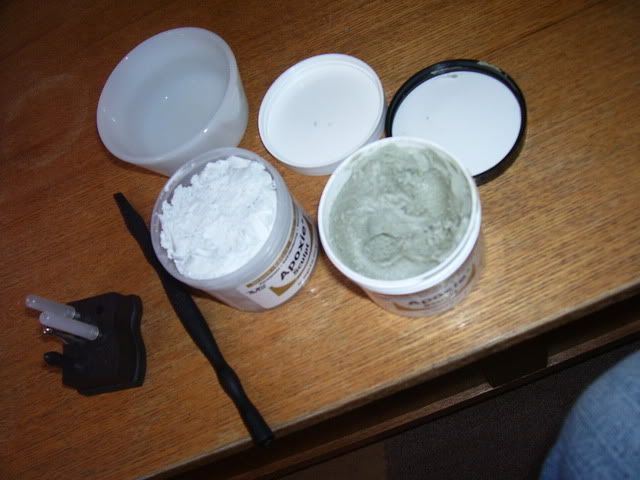
Apoxie Sculpt comes in 2 parts. Mix even amounts of each and kneed it together. (it is a little messy, but not too bad. It just kinda sticks to your fingers but it comes right off with water.
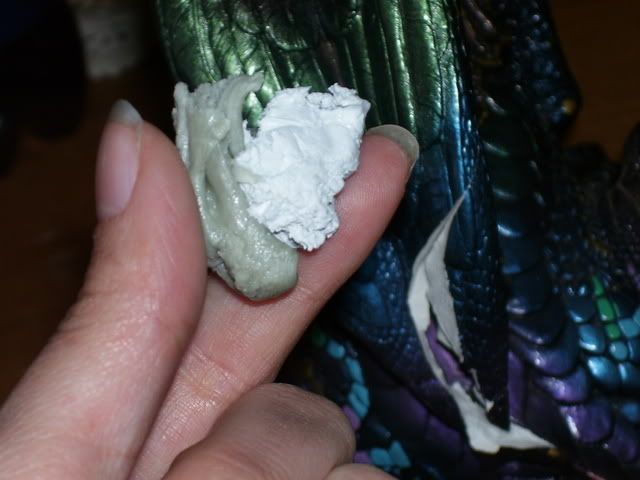
I grabbed to roughly same size blobs of it…
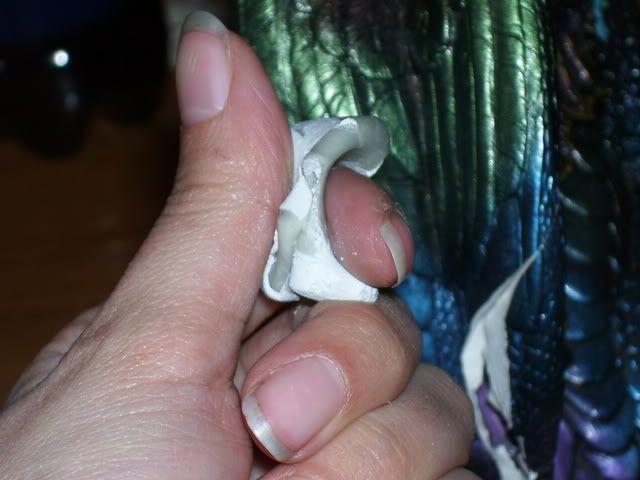
*squish squish squish* You want the Apoxie Sculpt to achieve a solid color
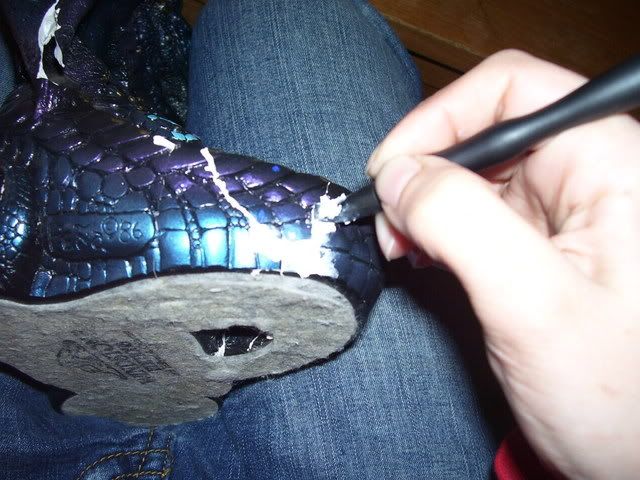
Use your plastic/rubber sculpting tool (looks kind of like a flat head screwdriver) to mush it down into all the cracks and crevices. This tool also works great for smoothing out slick scales.
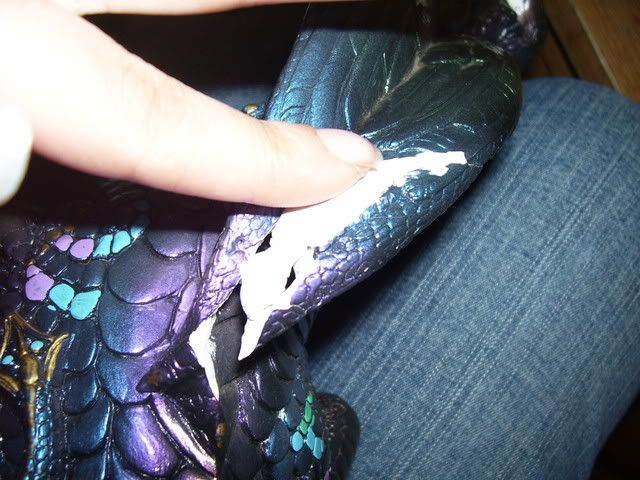
Fingers work too 🙂 Sometimes better actually…
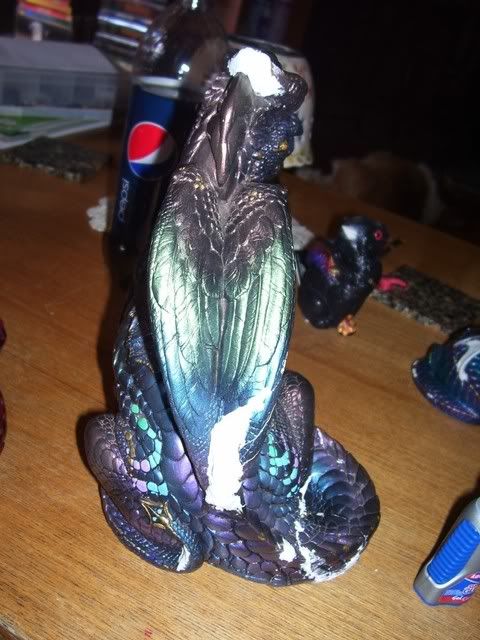
Okay, I have a good amount of here to work with. ( I tend to rush and do things all at once, but you can do each section separately if you feel more comfortable, As you can see I’m trying to crank out several repairs all at once, LOL ) It will set not too too fast, but plan to try and get your sculpting done within 20 minutes or so or else it gets hard to work with and you need to resort to scratching out details or sanding. *blah* I don’t like doing that myself, but you may prefer it. Apoxie sculpt gets SUPER hard though so I suggest doing as much as you can now before it hardens.
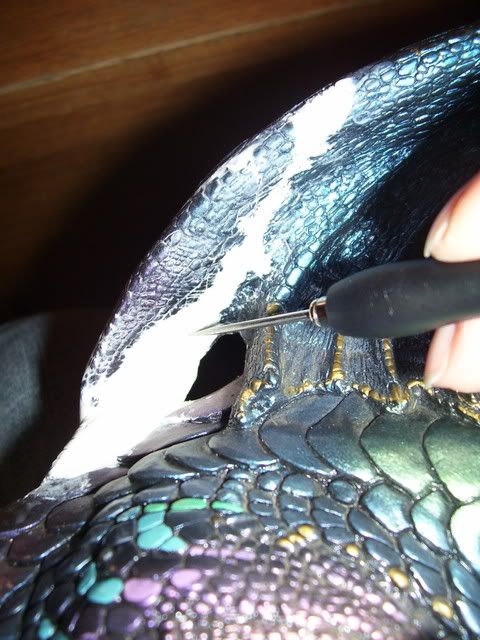
Now get your detail tool. There are several you can use so just choose what your comfortable working with. I like the pointed metal “toothpick” tool. It’s hard to see because it’s white, I know, but I’m just making a criss cross pattern about the size of the scales I need to make. This will make a good basic “drawing pattern” for finer details in a few minutes. You’ll probably etch out a bunch of little flakes as you go. If they don’t fall off, try blowing them off. Is some are stubborn and won’t then don’t worry about it, you will wash them away in a moment.
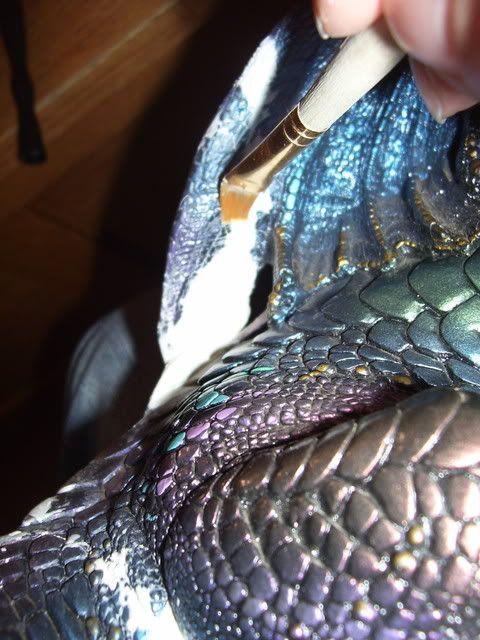
Now get a nice soft flat paintbrush and add a touch of water so you can soften the marks you just made. You don’t want to make the Apoxie Sculpt muddy, just dampen in enough so you can work with it a little easier. Work inside all the cracks and get a nice consistent look. Try and get any flakes of apoxie sculpt worked into the etchings and also keep an eye that you done “over” work your brush so your surface is completely smooth again or else you’ll have to repeat the last step and try all over again. ( I hope this makes sense)
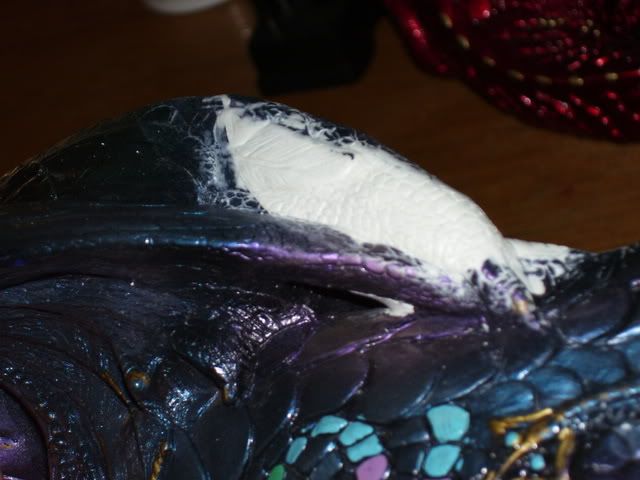
Resculpt your markings now with a little more detail, drawing out the individual circular scales, lines for the feathers etc. Keep repeating a light wash with your brush until you get the desired results. If you screw it up no worries! The apoxie sculpt is still tacky so you can just rip the whole thing off and try again if you have to. Once it dries completely though you’re stuck, so make sure you like what you see!
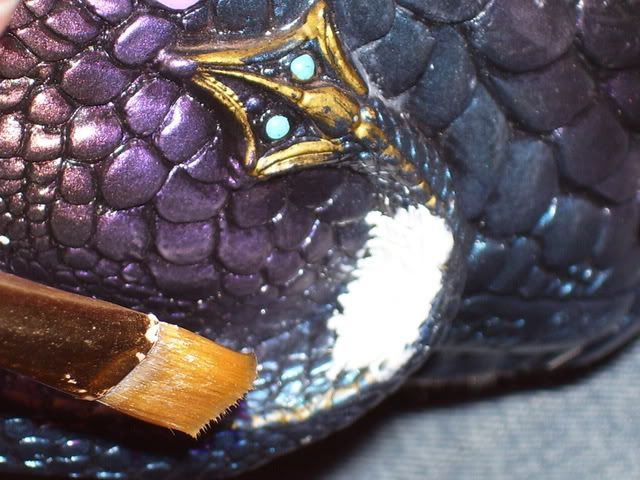
Repeat for other areas as needed… horns….claws……what I didn’t see that before…. ACK! *phew* This is a lotta work! but your almost done!
Once you get everything as you like let it dry. It usually sets within 2 hours, but since it gets SO DAMN HARD I tend to mess with it a about a half an hour 45 minutes to sand down any areas I might have flubbed. Dont do it too soon though. You can also put a dab of water on you finger and “rub” smooth areas instead of sanding. I find this has a nicer effect on large smooth scales like the ones on the side if the tail. Once it dries you can apply your base paint. Many mistakes you don’t see until you AFTER you apply your paint though *grumble*
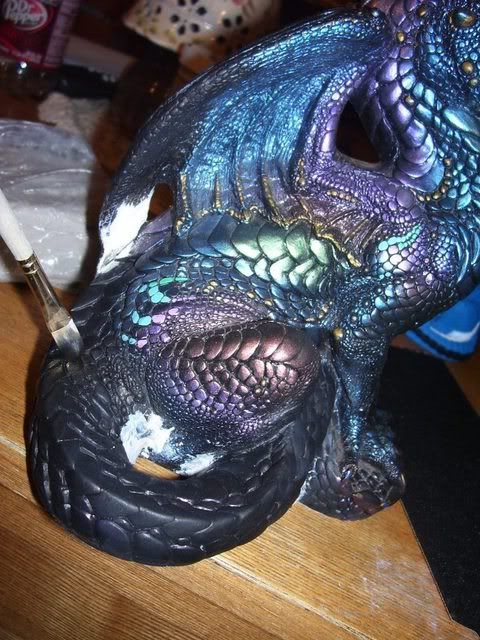 ]
]So if this happens to you like it did to me, let the paint dry fully and lightly sand the areas that don’t meet up to your standards…hairline cracks, lumps, etc…
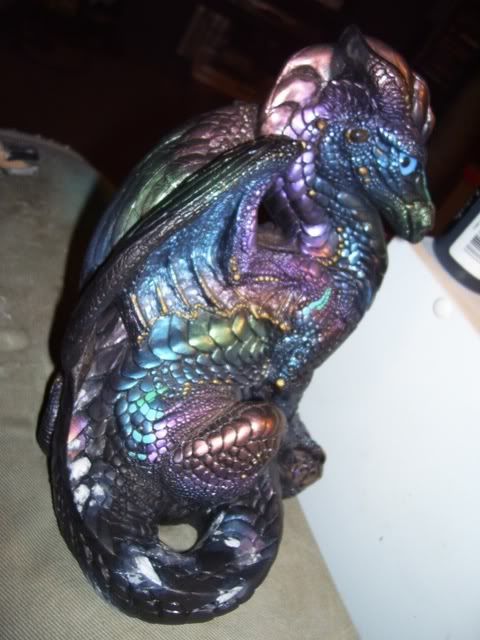
Repeat as necessary until your happy and there you have it! You fixed it! Hooray! Have fun matching your paint! Unfortunately I can’t help you there! I can’t really teach that one, it’s just a hit of miss and I just happen to have access to TONS of paint. It just takes time and patience so have fun! Or ask Melody for paint I suppose. 😳
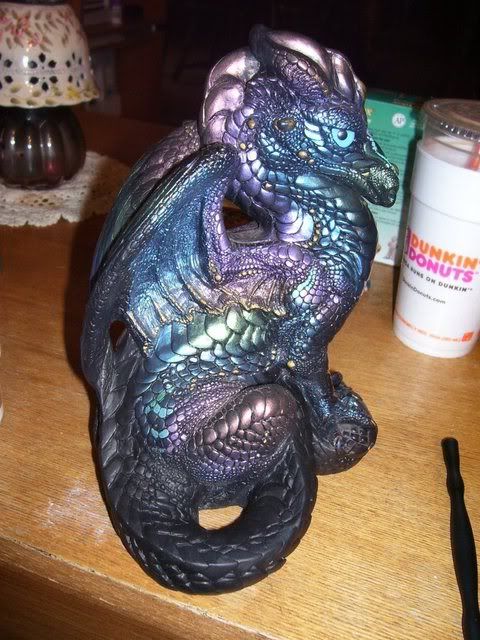 (psst, that green box in the background is marblex. Don’t use that… it really sucks. I only use it if I’m too lazy to mix more apoxie sculpt, but it stinks for little repairs, it just flakes right off)
So it’s pretty basic and I’m sorry for my lack of quality photos, but hopefully this will help out someone who has a repair they may be afraid to tackle themselves. 😀
Got a busted Windstone?
drag0nfeathersdesign@gmail.com
*OPEN for repairs**SEEKING GRAILS*
Arc-en-ciel Emperor
Siphlophis Male Dragon
Calypso Hatching Empress
Ivory Moss Sitting Baby Kirin
Tattoo Mother Kirin
Emerald Tabby Male Griffin
Tie Dye + Orion Hatching Royalty
Indigo Rockfish + Flame Tabby Little Rock Dragons
Dragon Quail + Obsidian Frost Old Warriors
Betta Sun Dragon + Male Dragon
Dreamscape, Orion, Poison Dart, Fireberry, Spangler + Tigerberry DragonsMarch 19, 2009 at 12:26 am #757125Wow! That’s incredible and VERY informative. You’re quite talented at blending the sculpting details.
Thanks for showing us how you repair Windstones!
Windstone collector in remission. 😉
March 19, 2009 at 12:41 am #757126Awesome ^^ Thank you Dragonfeathers
I’m going to have to try that at some point.
March 19, 2009 at 1:16 am #757127Thanks! That might be useful! *eyes the fledgeling dragon in the cupboard*
March 19, 2009 at 1:35 am #757128Ah! I didn’t think about using water with it! Thank you!
I am glad that my gothic unicorn’s hooves and my flapcat’s ear turned out okay!March 19, 2009 at 4:09 am #757129Wow thanks for the tips Drag0nfeathers! :3 I’ve been borrowing dad’s bondo from his car restoration garage to fix chips and such and that dries in a minute! Apoxie sounds a lot less stressful.
March 19, 2009 at 4:44 am #757130Awesome tutorial, thank you! Already have ideas for applying it…
March 19, 2009 at 5:11 am #757131Great job Drag0nfeathers! I know that Kyrin gets her paint for repairs from Melody… How wonderful to have so many talented folk on our forum 😀
twindragonsmum 😀
tdm
March 19, 2009 at 10:32 pm #757132I’m glad some of you will find it useful 😀 Thanks!
Got a busted Windstone?
drag0nfeathersdesign@gmail.com
*OPEN for repairs**SEEKING GRAILS*
Arc-en-ciel Emperor
Siphlophis Male Dragon
Calypso Hatching Empress
Ivory Moss Sitting Baby Kirin
Tattoo Mother Kirin
Emerald Tabby Male Griffin
Tie Dye + Orion Hatching Royalty
Indigo Rockfish + Flame Tabby Little Rock Dragons
Dragon Quail + Obsidian Frost Old Warriors
Betta Sun Dragon + Male Dragon
Dreamscape, Orion, Poison Dart, Fireberry, Spangler + Tigerberry DragonsMarch 19, 2009 at 11:34 pm #757133accidental double-post 😳
March 19, 2009 at 11:43 pm #757134I’ve been using Apoxie Sculpt as well (Kyrin also uses it). I’ve used it for other things and it really is pretty nice to work with. 🙂
I’ve never been able to find it in a store, but I know you can order it online from the company. They are a little slow to ship out, but not terribly (took an extra week than what I expected, but not too bad once it was shipped). You can buy it in different base colors too and in different sizes, including smaller amounts, for those of you who aren’t doing a lot of repairing, all the way up to large quantities for anyone with a large repair job, or just wanting to use it for sculpting. The company website is here:
http://www.avesstudio.com/Products/Apoxie_Sculpt/apoxie_sculpt.html
From an email Kyrin sent me a while ago when I first asked her about it:
Kyrin wrote:I’ve only been able to find it online.
I would suggest you get the smallest amount, just because you don’t plan to do alot and it’ll save you money that way.
The most important thing about it is to make sure you have equal amounts of Part A and B when you mix it, then mix it to death. It will be pretty sticky at first, but if you let it rest for about an hour, it doesn’t stick as bad, you have roughly 4 hours working time. I recommend wetting your hands with water a little before working with it after the rest period, it helps keep it from sticking to you.
March 20, 2009 at 7:43 pm #757135Hmmm, I like using it right away. Because of it being sticky it sticks to the sculpture nicely without using any adhesive. After an hour it’s too gritty for my to work with. At least i think so, but I have sensitive wrists so maybe that’s why.
Got a busted Windstone?
drag0nfeathersdesign@gmail.com
*OPEN for repairs**SEEKING GRAILS*
Arc-en-ciel Emperor
Siphlophis Male Dragon
Calypso Hatching Empress
Ivory Moss Sitting Baby Kirin
Tattoo Mother Kirin
Emerald Tabby Male Griffin
Tie Dye + Orion Hatching Royalty
Indigo Rockfish + Flame Tabby Little Rock Dragons
Dragon Quail + Obsidian Frost Old Warriors
Betta Sun Dragon + Male Dragon
Dreamscape, Orion, Poison Dart, Fireberry, Spangler + Tigerberry DragonsMarch 22, 2009 at 4:02 pm #757136Great job Drag0nfeathers! I only use the Apoxie sculpt, I find it’s the greatest! I first used it on model and resin horses but then decided to try on my Windstones and I won’t go back to any other stuff. 🙂
-
AuthorPosts
- You must be logged in to reply to this topic.
