Forum Replies Created
-
AuthorPosts
-
WOW!
Well done!!!
Stephanie, that was the look I was going for, the colors of fire in the fleshy parts with the cooled crust as the dark scaly top layer. But it is turning out quite “dark”. The scales and “body bumps” are pretty closely gathered, which is making the black color fairly overpowering. All part of the learning process. It is my first piece and I am going to keep him as such no matter how he turns out.
Skigod, While it might not be the only leafed dragon, I did see one in the gallery created by Jennifer Miller in 23k gold.
The photoshopped horns are masking the issue that the horns are modified. They are spiraled pieces of epoxy embedded on stainless steel rods. I decided to remove them from the image as it is not an accepted practice. Just to touch on the subject, clarity is everything and just as with painting, you must clearly define what you have done to an item which maintains a copyright to ensure there is no confusion and this just skims the surface. If in doubt, don’t.
Thanks for the kind comments, it looks like I’m hooked.
Here is the progress of my dragons using different techniques. Going to create four elementals, Fire, Earth, Air and Water. Also have a leafed Copper in the works.
The Fire dragon is using a simple palette of red, yellow and black to create a lava looking skin.
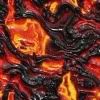
Air brushed the first layer.
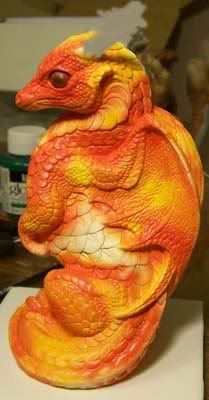
Starting the black dry brushing.
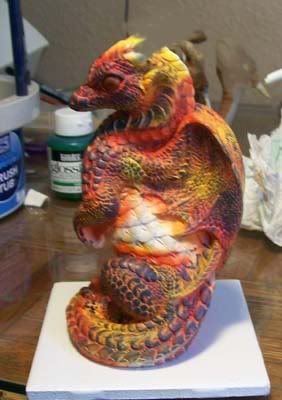
and now starting on filling the scales black. He is turning out darker then I envisioned, but still interesting. The wings will be lightly antiqued in black.
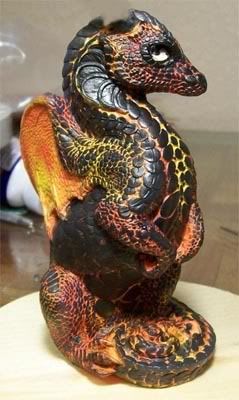
And my Copper and Air Dragons in their early stages.
The Copper dragon will be completely leafed in copper then highlighted in a metallic green. The leafing process is a project in itself.
The Air dragon will have silver leafed mane and chest scales then painted using a “sky” palette.
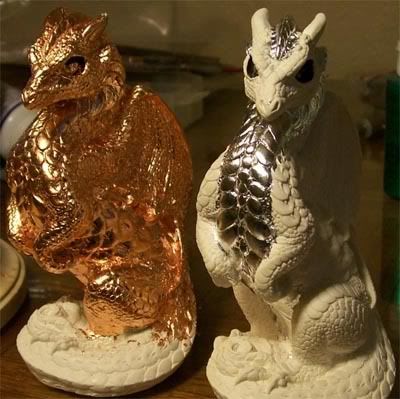

Fun stuff !
It worked, I did not soak the piece. Just loaded a toothbrush with acetone and scrubbed away.
Cleaned out all the nooks and crannies. Rinsed it with soapy water, and letting it dry (it’s almost 90 degrees today, so it won’t be long). The eyes stayed put, but I was pretty careful on where I applied the solvent.
Thanks Kyrin !
Phoenix, the reason I did not want to add additional paint was due to the issue of detail lost with buildup. I am going to airbrush, so the coats will be fairly thin. Thought it better to retain as much of the original surface detail as possible. Plus I want lighter colors which would require quite a bit of heavy pigment to cover the darker old paint.
It’s a learning curve for me, so I appreciate the suggestions.
Hello my friends,
Does anyone have any experience with removing acrylic from the small details of their PYO’s.
So far I’ve tried 70% alcohol and a tooth brush with limited success.

Would really like to get the detail crevices as clean as possible with damaging the texture. I’ve touched it with a very fine dental pick, but that tends to introduce scribe lines.
Any sure fire homebrews that will not cause damage to the cast?
Thanks!
Thanks Jennifer,
I wrote John Saturday and am interested on what he has to say. Which ever way it goes, I’ll certainly abide by the Forum rules (with maybe a bit of grumbling 😉 …
I’ve been using Magic Sculp, it sounds very similar to Apoxie Sculp (two part mix, chemical cure, sticky, hehe and extremely durable when cured). What is the set texture of AS?
MS has a gloss set which is not ideal for taking paint.Nor does anything else like to adhere to the MS surface without more prep work.I’ve tried adding about 10% polyclay, which has worked great on test pieces, but don’t know how the little guy will hold up to the 265 degrees of oven temperature needed to cure the poly. (So far he has taken 180 degrees and hopefully any moisture that was present is gone).
Dko, I think you’ll find most epoxies do not have the ability to hold shape. Usually I’ve used it exclusively with an armature. In Kyrin’s case, it is working great as a filler.
Anyways, it’s fun to experiment.
Hi Kyrin,
If you don’t mind me asking, what are you using for filler? Specially for the larger voids.
Thanks everyone!
And Thank you Kyrin for the warning!
As for my critters, at this stage, I need to wait for some confirmation on what can be altered on a production piece before I jump the gun and post some pictures (and ruffle feathers).
I’ll probably purchase one more and just give it a top coat.
Looks like fun stuff!
I’m a novice sculpture who came upon a rather battered Windstone dragon which followed me home.
Before I settle in, I guess I should say I’m rather a tinkerer, and find it difficult to leave well enough alone. I’ve searched through the forums looking to see if anyone else has the lunacy to take a prefectly wonderful item and change it just because they can. Well, I’ve yet to see a post in that direction, so hopefully what I’ve done will not be considered blasphemy 🙄 .
My first Windstone Dragon is pretty badly damaged with the front of the tail and feet missing, there are some other nicks and chips, but restorable. I was rather taken in by the huge amount of detail these figures contain. The felt on the bottom led me here and on to buying my second Dragon.
Hopefully no one will take offense to the process I am undertaking. I already have an idea on how I will repair my damaged Dragon and while not orginal, it will hopefully be interesting.
The community here has created some very unique color schemes and I hope that when the time comes, I’ll be up to the task.
-
AuthorPosts
