Home › Forums › Windstone Editions › Paint-Your-Own Windstone › Amstaffs PYO Thread– "Fire and Ice" Kitsunes, finished pair
- This topic has 127 replies, 1 voice, and was last updated 10 years, 3 months ago by Stormbreeze.
-
AuthorPosts
-
August 15, 2014 at 2:18 am #917529
LOL ! Wow, you sure do have your plate full 🙂
August 22, 2014 at 4:08 am #917778OK, here is a update :
Been adding some more color, layers, a bit at a time. Added a lighter orange over the darker orange on the feathers to create a more natural look, and I liked the outcome. Added Black to the scaled area on the belly, and more purple to the curvy scales to try and darken it some– but Im finding the streaky look there is hard to get rid of. Painted the fur/hair areas yellow to start that off. Added more green to the scales above the wing, to darken them and try and cover streaky looks…. also finding this area hard to work with. Oh, and seem to be getting little dabs of paint in areas I didnt intend it to be…. any tips on removing this, or covering it up?
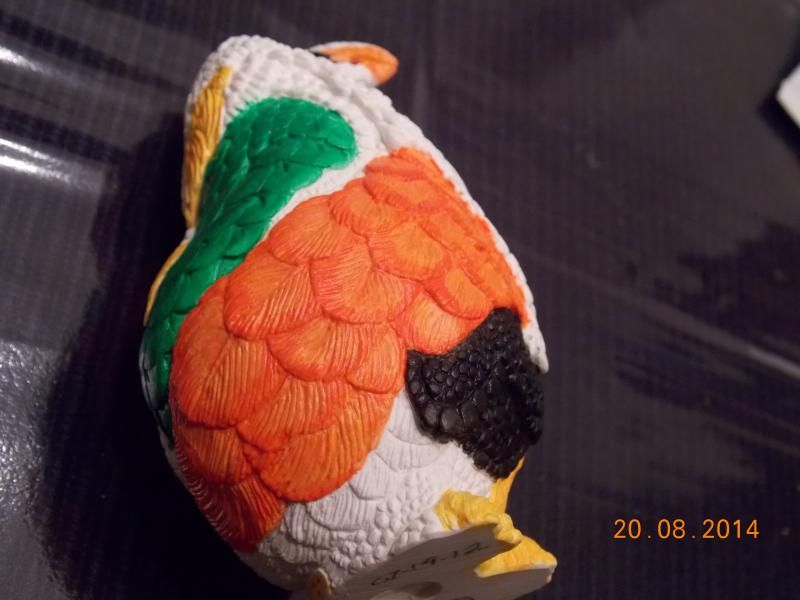
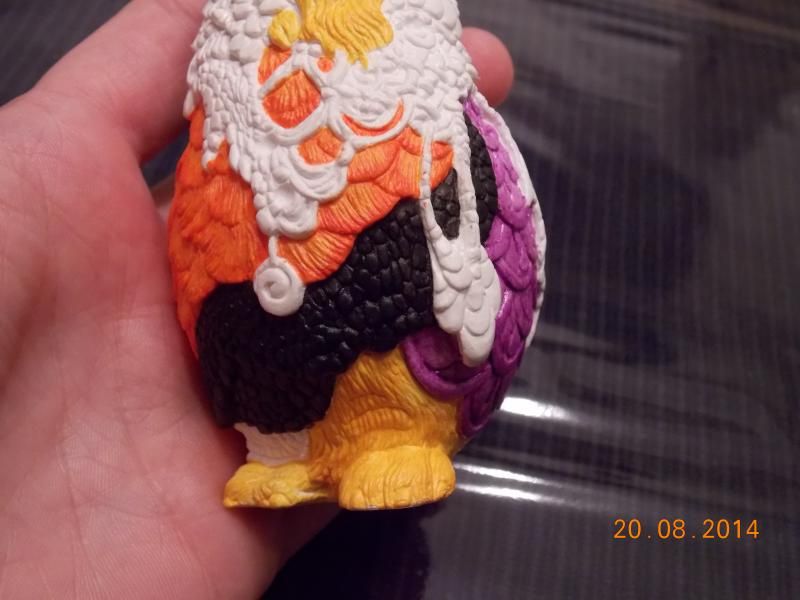
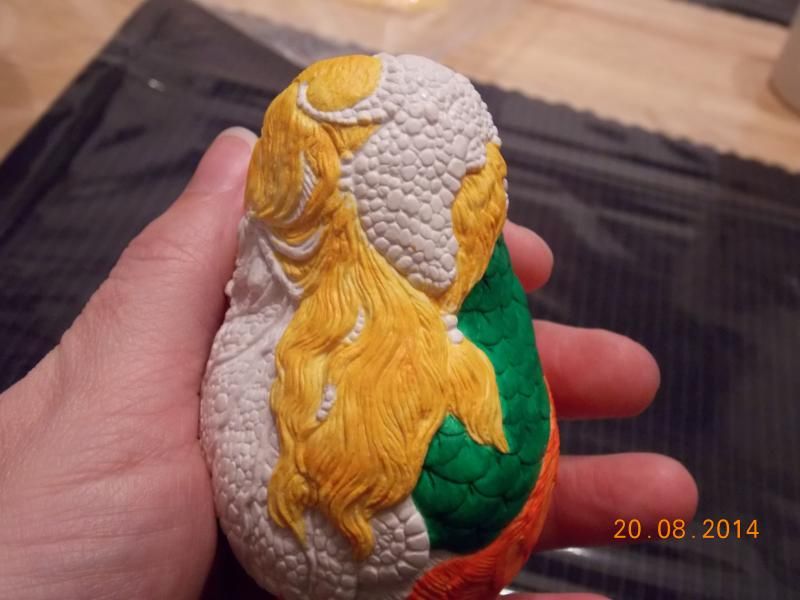
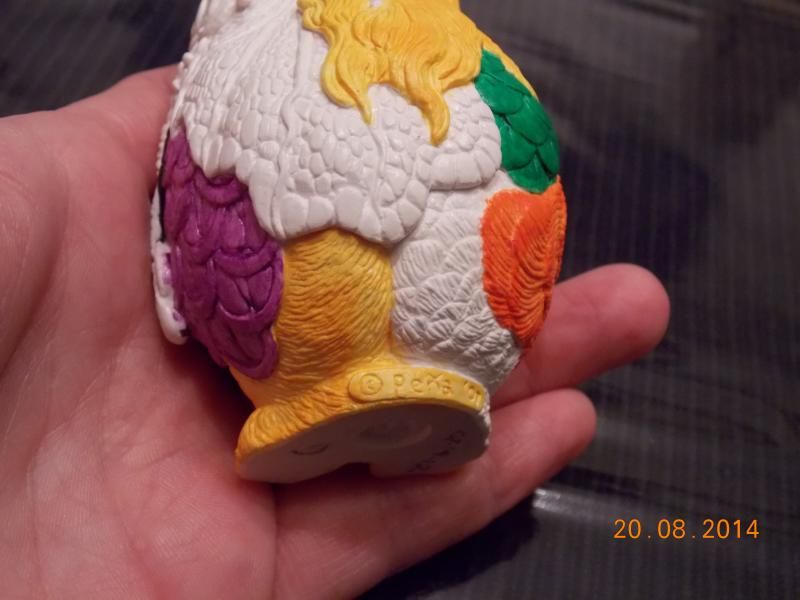
Then things went wrong…… I added more green, then a light layer of black to try and cover the streaky look…. didnt look right, tried to whipe the black off.. and made an awful mess !!! Acck ! So then I tried to remove all the paint in this area so I can redo it. What a mess I made !! I used a damp sponge to try and rub this off… Im guessing this is NOT the way to do this properly? Any tips on how I should have done this to avoid the mess I made ? 🙁 I now have random spots of the green paint I tried to remove over other areas of my Muse… 🙁 I could cry 🙁
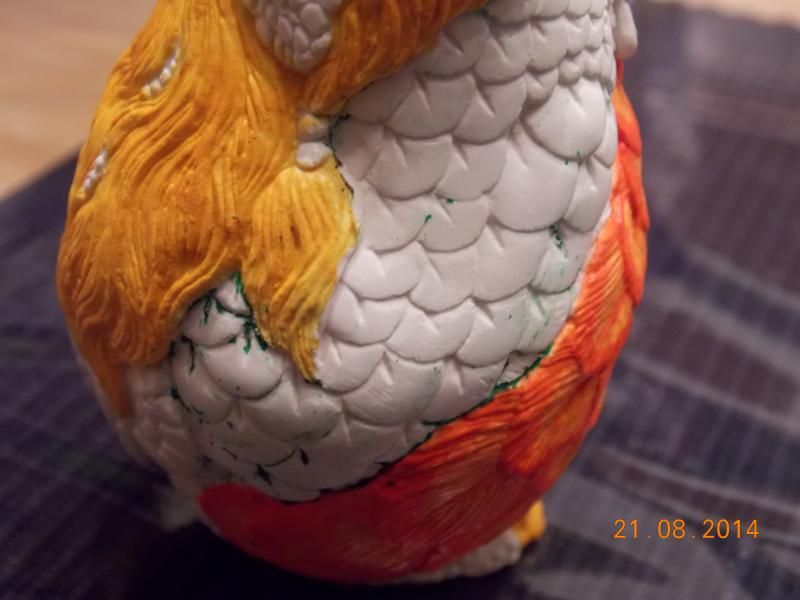
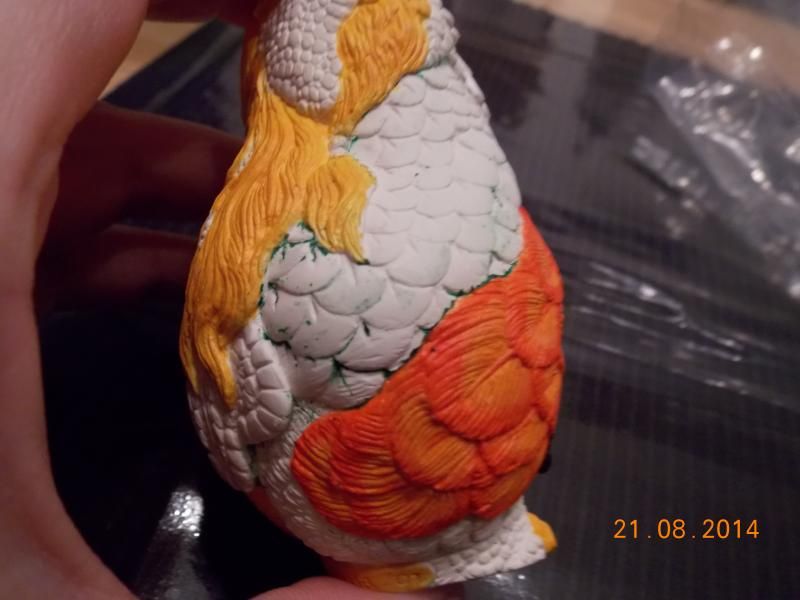
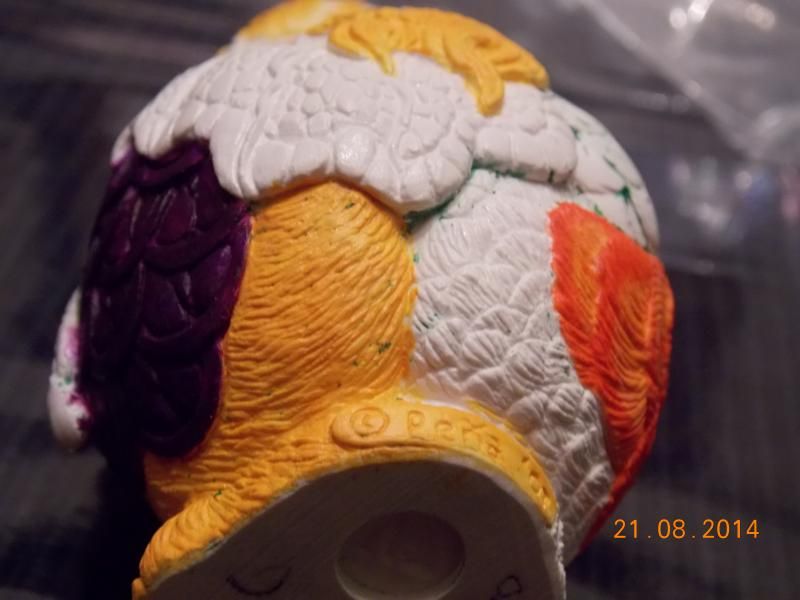
Also added a dry brushing of grey over the black scales to try and give them some depth, as I found the black just made the whole area one big black blob with no detail. (Not sure if I did the dry brushing the right way? But I dont think it turned out too bad… just a tad lighter than I wanted)
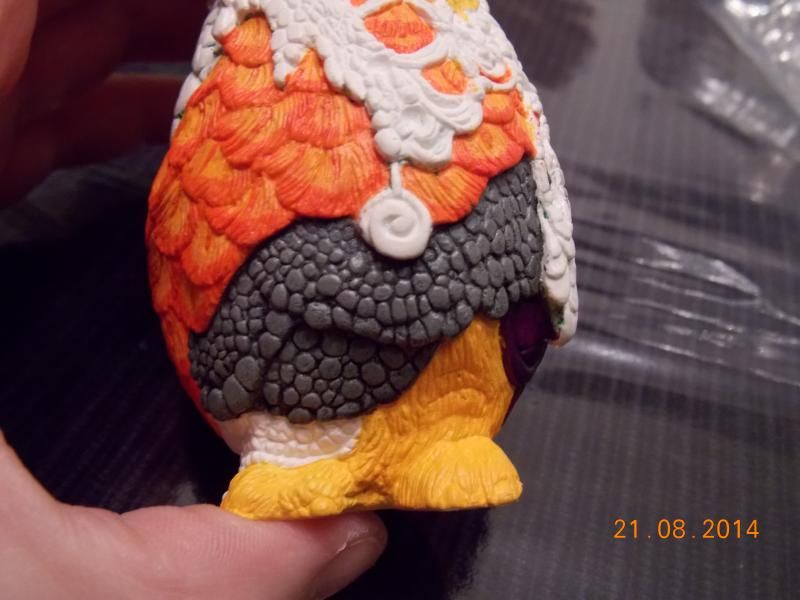
Added a tad more detail to the feathers… now I think I liked them better before I painted the center spine of each feather a darker color… ugh… messed up by trying to add too much detail.. they do say sometimes less is more. :/
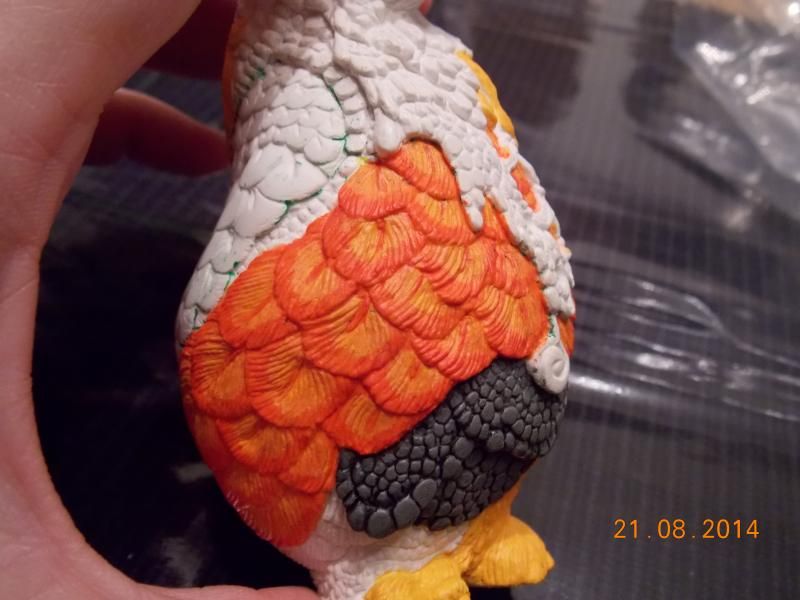
Added more purple to these scales… just find these hard to cover up properly… wondering what steps to take next here to make these look better?
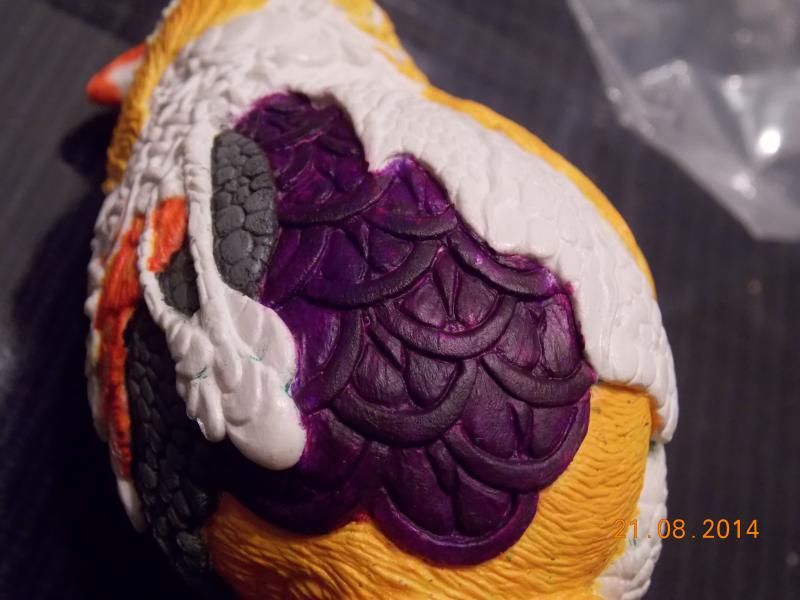
Today I painted that mess that used to be green, black as a base coat…. not sure how this will work out now. I would still like to make these green, but not sure how to make this show up over the black…
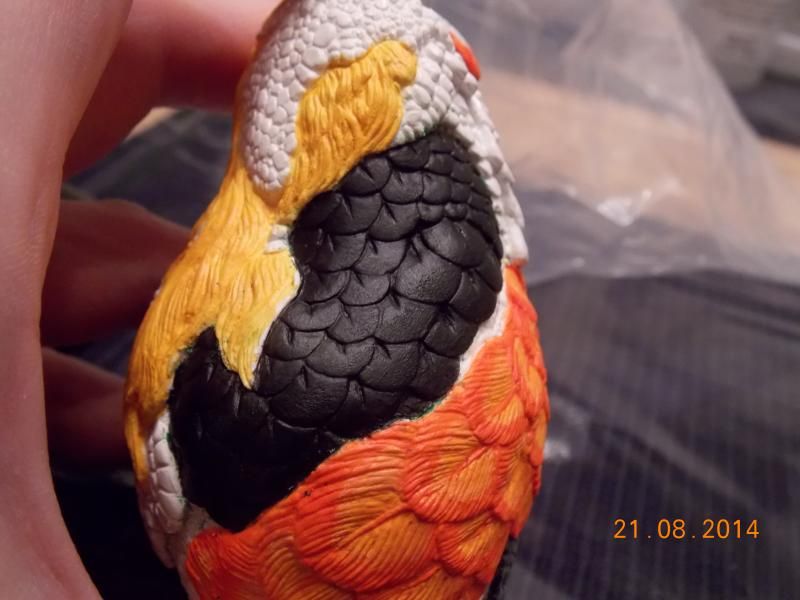
This is definitely a learning process ! Any tips would be appreciated 🙂
August 22, 2014 at 5:08 am #917780If I get spots of paint on areas I don’t want and it hasn’t dried long, I wipe it off with a Q-tip dipped in water. If that doesn’t work, you could maybe dab a tiny bit of nil polish remover on a wet Q-tip and try rubbing paint spots off with that. You can paint colours over black. Especially if people are using metallic paints, a lot use a black base but if yours aren’t metallic it might work to cover the black if you use the paint thick, not thinned down. You can paint over paint mistakes most of the time too with thick paint if you can’t get the mistake paint off.
Looking for rainbow or pink & teal grab bags!
August 22, 2014 at 12:07 pm #917781Like Kim said, if you’re into metallics, go for metallic green – FolkArt has a few different metallic greens. Or you could antique with green.
For the dry brushing, if it’s too light, then dry brush another coat with a darker grey.
The streaky purple needs more coats! More coats will give you a uniform look.
For unwanted spots, if they’re fresh, a wet Qtip will work. You can try with the drier spots, just rubbing, but chances are, the paint around will also come off. If the spots are too dark to cover up, you could cover it up with a dab of really opaque white (CeramCoat is what I use), then paint over it.
The only time I get paint where is doesn’t belong is when I handle the PYO and the paint isn’t quite dry. Acrylic dries really fast, but it still needs a bit of time to cure completely. Wait an hour or so before handling it.
Lookin’ good!
Read my books! Volume 1 and 2 of A Dragon Medley are available now.
http://www.sarahjestin.com/mybooks.htm
I host the feedback lists, which are maintained by drag0nfeathers.
http://www.sarahjestin.com/feedbacklists.htmAugust 27, 2014 at 5:51 pm #918005Looking good Amstaff. I agree you could antique in green. A few more coats and you’ll see the difference and most likely be pleased with the outcome. I notice your still wishing your paints were a bit thinner without losing color. I use Americana drying time extender medium ( cheap but effective for me.) I find I only need a few drops to add to my paints and it doesn’t change the colors at all. makes the paint thinner, more coats are required but, that’s all in the fun of painting the PYO. Of course I’m an amateur PYO painter compared to most here on the forum. There’s a wealth of brains that can be picked here. 🙂 I really like how your feathers are coming out. Very nice so far.
August 28, 2014 at 1:25 am #918053You could try dry brushing metallic green lightly over those black scales. But only if you like metallics.
You can check out my work on dA & Redbubble!
https://prezaurian.deviantart.com/
https://www.redbubble.com/people/prezaurian?ref=artist_title_nameAugust 29, 2014 at 5:41 am #918125Thanks for all the recent tips! I like the idea of metallics, but dont have any yet. Maybe someday I will invest in some. For now I been adding some iridescent medium to my colors, and this has been giving me a nice sheen effect.
I have added a green mixed with iridescent medium over the black scales (that were previously messed up) and they look kinda good now 🙂 I have progressed quite a bit on him lately, and will try to post some new pics in the next week or so, when I have some more time.
August 29, 2014 at 6:54 pm #918145So I been working with Golden Fluid paint- in iridescent gold (fine) and I cant seem to get it nice and smooth looking. It looks lumpy and uneven, and thats with 2 coats now. Any suggestions? Should I try mixing a medium in so it goes on smoother?
August 30, 2014 at 1:18 am #918157So I been working with Golden Fluid paint- in iridescent gold (fine) and I cant seem to get it nice and smooth looking. It looks lumpy and uneven, and thats with 2 coats now. Any suggestions? Should I try mixing a medium in so it goes on smoother?
How are you brushing the paint on? Are you making repeated brush strokes over the same area while the paint is wet? When paint is brushed on too thin it can dry while you’re brushing it on. Then it can start to retain brush strokes. I’m not sure if this is the problem though. Just an idea of something that might be going on.
You can check out my work on dA & Redbubble!
https://prezaurian.deviantart.com/
https://www.redbubble.com/people/prezaurian?ref=artist_title_nameAugust 31, 2014 at 3:21 am #918194So I been working with Golden Fluid paint- in iridescent gold (fine) and I cant seem to get it nice and smooth looking. It looks lumpy and uneven, and thats with 2 coats now. Any suggestions? Should I try mixing a medium in so it goes on smoother?
Hmm… I used Golden Fluid paints. My iridescent colors are a tad bit thicker than my other colors (but it might be there age or the fact that the pigment is bigger), but they all still go on nicely. As stated above, you could be over brushing (and possibly even underbrushing…). Or have bad paint. I’m not sure how you may be getting the “lumpy” result. You can try thinning them down to see if that reduces the lumpiness. However, you will probably still need more than 2 coats to get even coverage. The back of the bottle indicates that the color is somewhat “Transparent” on the Transparent-Opaque scale.
You might have mentioned it already, but did you base coat your piece before you painted it?
September 5, 2014 at 5:00 pm #918458I do have a base coat. Plus this was an area I was having some issues with anyways, and the gold is painted over another few layers of color, as an accent to edges of large scales. Personally, I think its just the fact that its gold, and is harder to get that shiny smooth gold look from. Plus its over top of layers of other paint that also did not appear to be so nice and smooth.. lol!
This is my first PYO… and I know Im learning as I go 😉 I have progressed more, and have more pics to post, if I ever get around to it, lol! 🙂
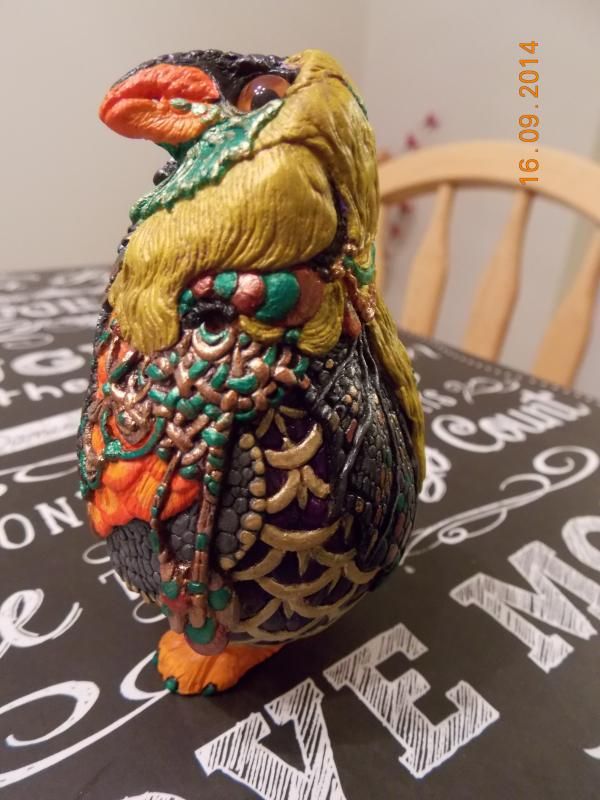
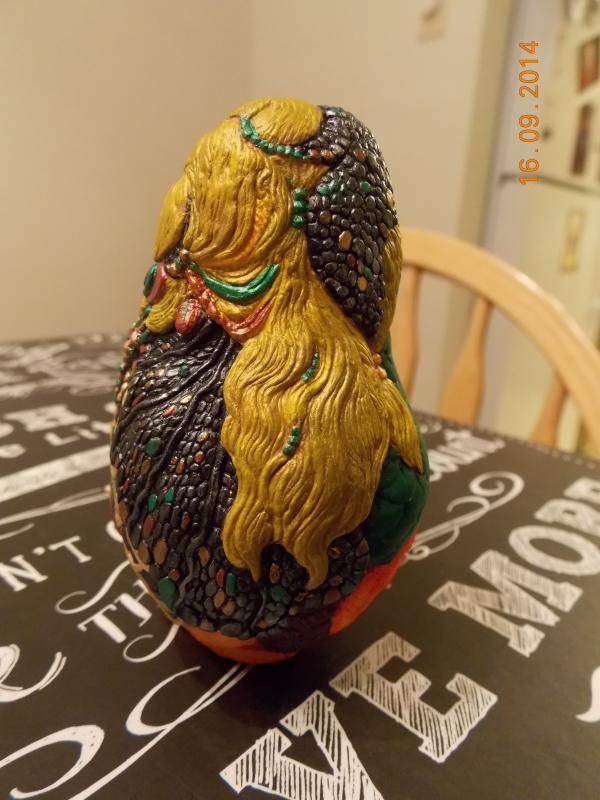
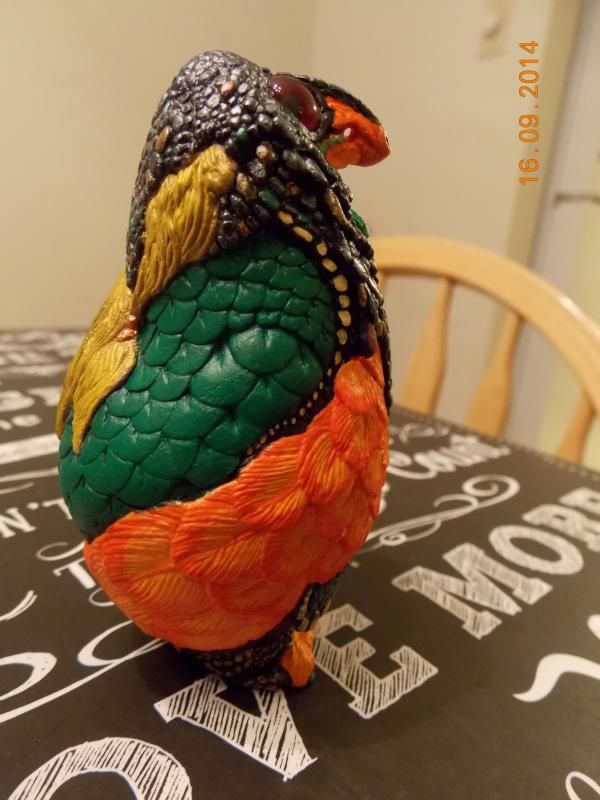
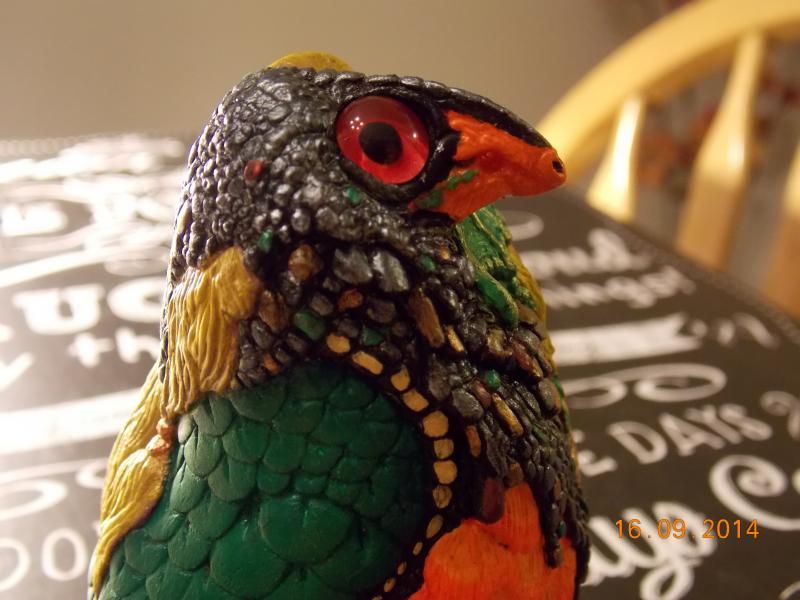
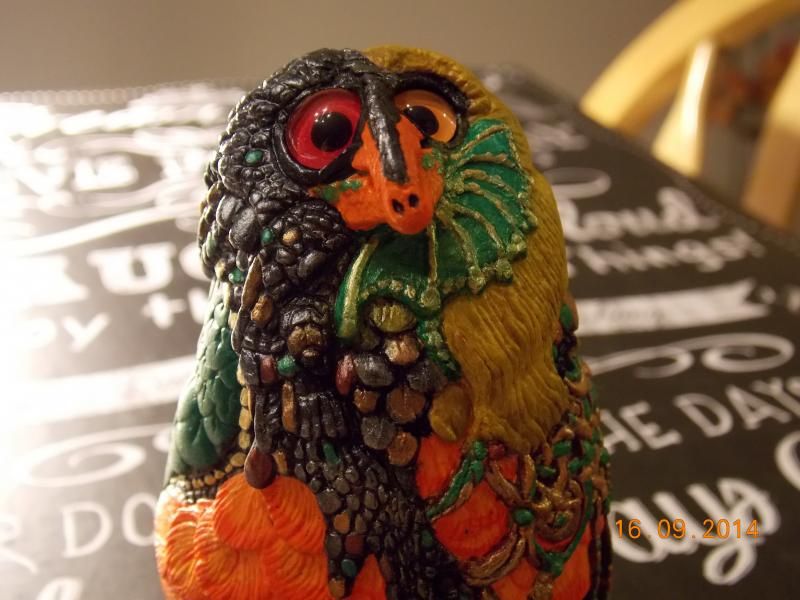
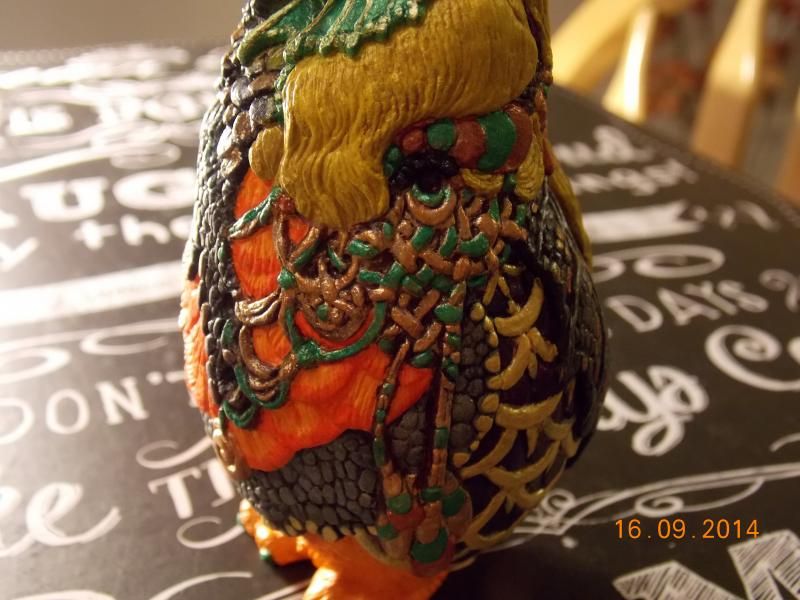
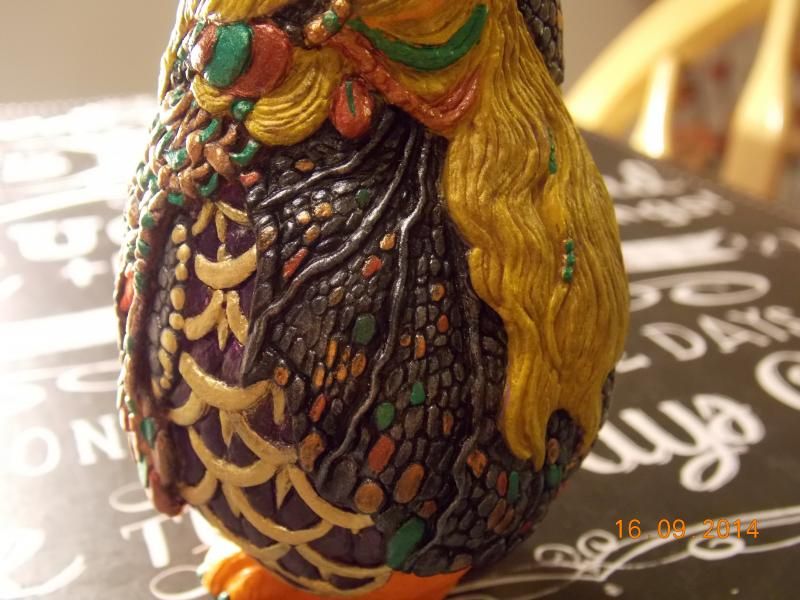
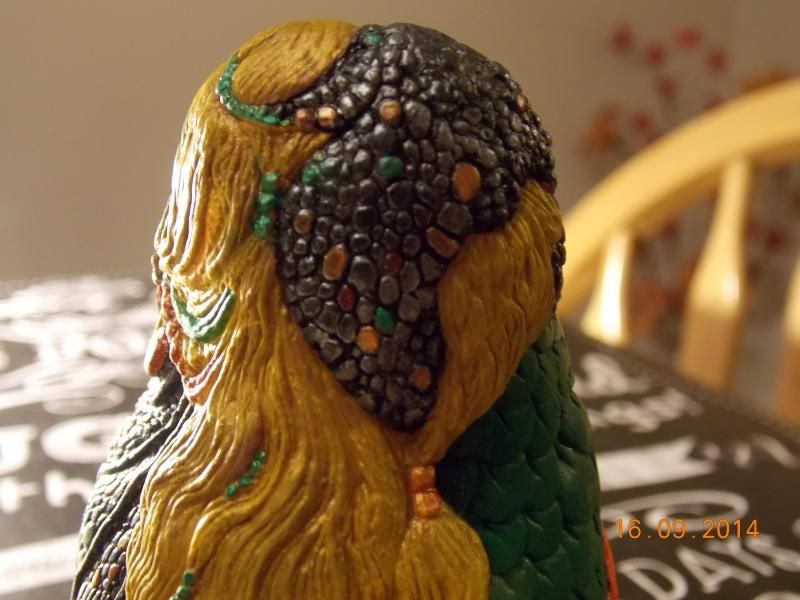
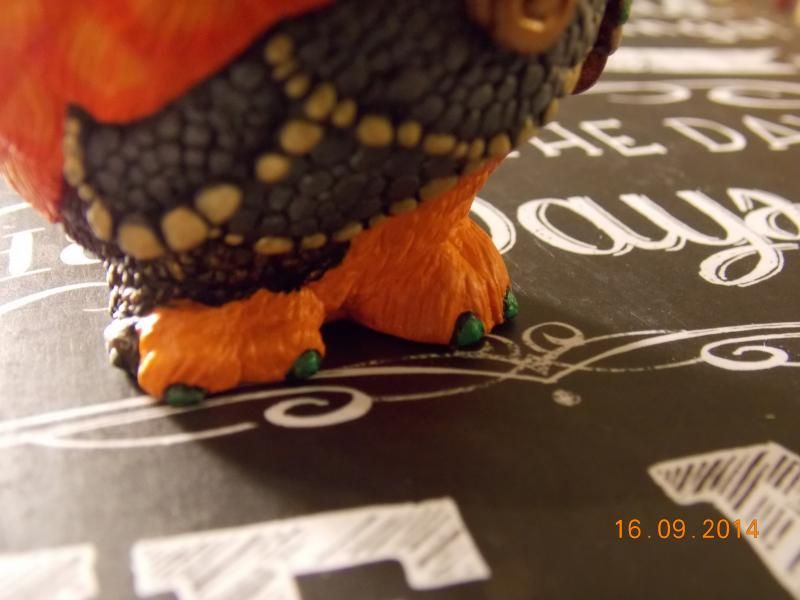
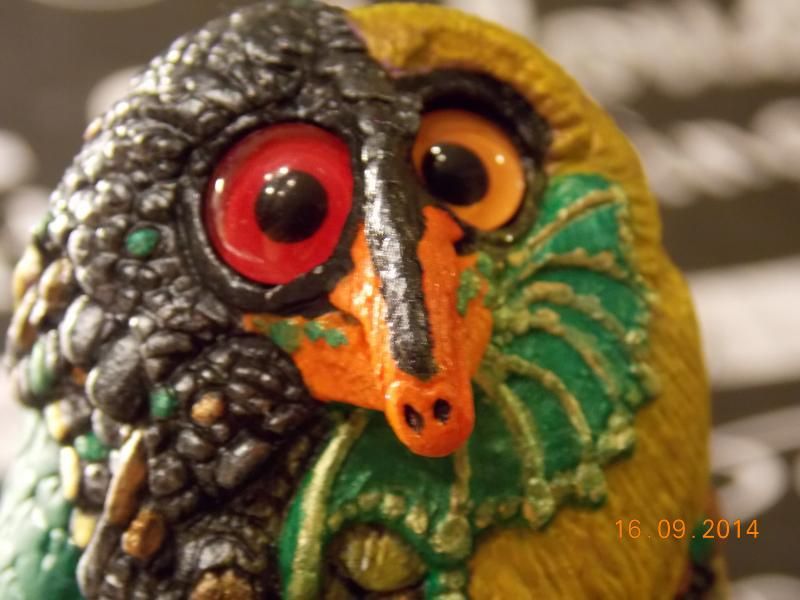
September 16, 2014 at 4:28 am #918938So I really accomplished a lot lately, and am quite happy with my first PYO !! Please note the following pics are off some color wise, as the lighting wasnt the best. The metallic colors present are hard to pick up, like the hair for instance. Its actually a yellow-gold color, and the pics just dont do this guy justice. I still have to apply the sealant and glue in his eyes… but I just had to post some pics !!
So here he is, meet Mr Boomkin the Muse !! (He reminds me of a character from World Of Warcraft I used to play as hence the name Boomkin, lol )
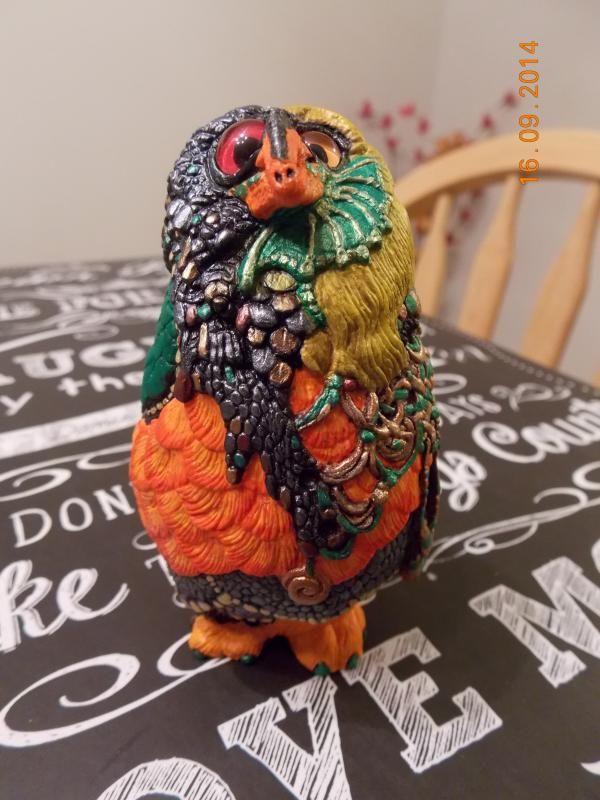
 September 16, 2014 at 8:23 am #918943
Wow, she came out excellent! Nice job Amstaff! 😀
Check out my finished artwork at http://falcolf.deviantart.com/ and my sketch/studio blog at http://rosannapbrost.tumblr.com/
Excellent!
September 16, 2014 at 10:50 am #918945Really Nice Muse! Great first PYO, Amstaff! Can’t wait to see more of your pieces – what are you planning on doing next? Maybe join us in doing the Fall Swap? 🙂
You may think I’m strange, but I really like the Muse sculpt and it’s quirkiness. I believe it’s a cute little critter and fun to paint.
I’m on my fourth one now! 😀IN SEARCH OF MY NEXT GRAILS:
Silver, Bengal & Butternut Adult Poads
Kickstarter 'Rainbow Tiger' Bantam Dragon*~*~*~* Ela_Hara: The DragonKeeper *~*~*~*
*** Come visit me on deviantArt at http://ela-hara.deviantart.comSeptember 16, 2014 at 2:43 pm #918950Nice job Amstaff, it looks really good! I love the work you did on the feathers. I’m going to be trying PYO eventually, I think, but it will be awhile until then. Yours looks so good, it gives me hope for if I ever try.
[i]Keeping an eye out for fantasy gryphons and test paint dragons.[/i]
-
AuthorPosts
- You must be logged in to reply to this topic.
