Home › Forums › Miscellany › General Art Discussion › Polymer Dragon Project
- This topic has 21 replies, 1 voice, and was last updated 14 years ago by Amanda.
-
AuthorPosts
-
January 17, 2011 at 8:00 am #835889
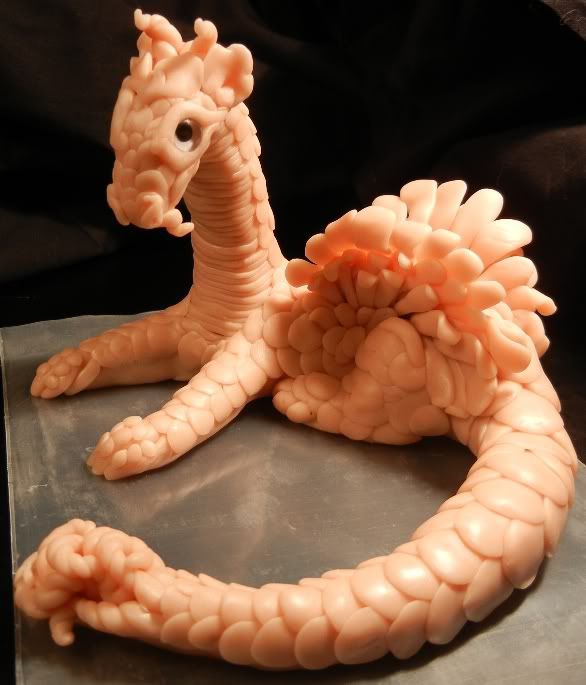
I got some Super Sculpey in the mail the other day and I decided I would take a test run in making a dragon! I’ve never done one of these before, the most I’ve done with polymer clay before has been with Fimo to make my little Devil Squirrels, but I couldn’t resist trying to make something more complex once I’d seen some of the awesome art that people on here have managed.
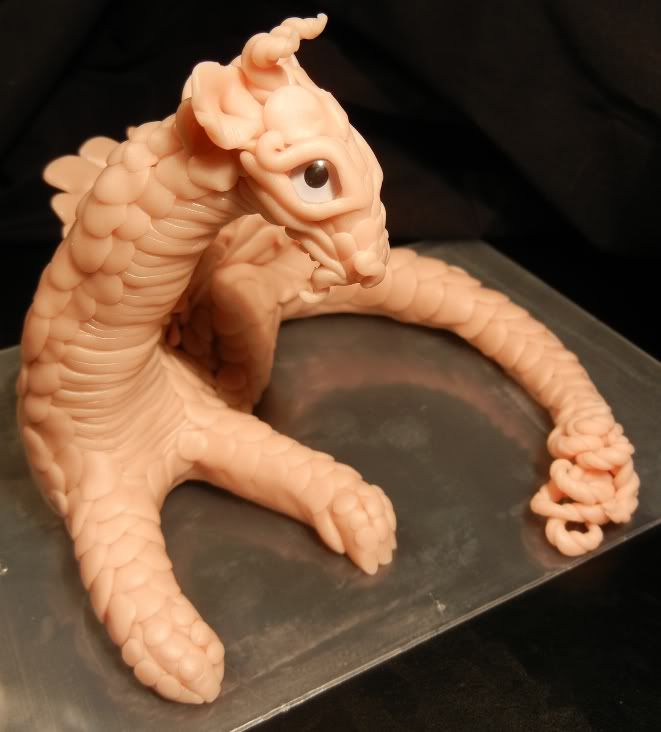
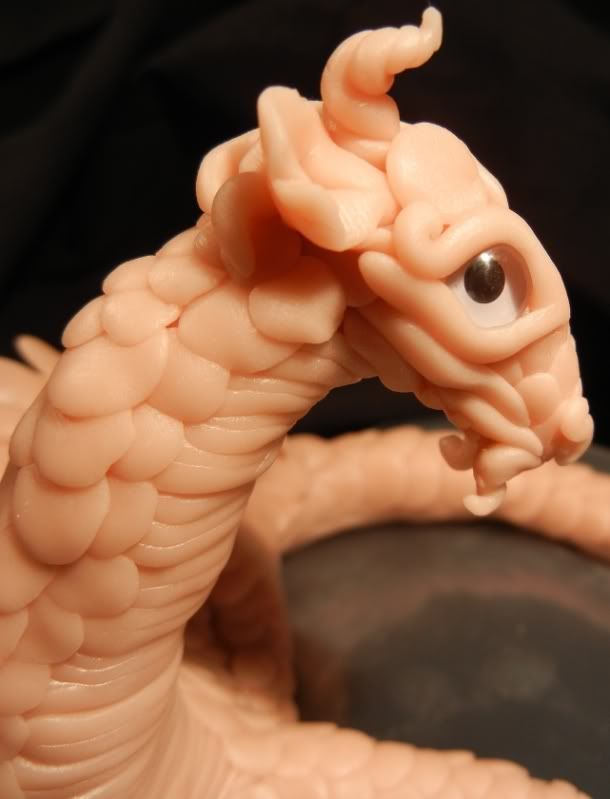
This guy is unbaked in these pictures, and I will likely be building up his back leg a bit more – you can see it best in the first picture, and in the rest it gets a little lost, but I’m pretty happy with him so far! I’ll likely be finishing him up tomorrow and baking him, then starting to paint him tomorrow as well.
I used metal wire to make a skeleton, then added some tinfoil for bulk, and then layers of sculpey on top to give him detail. The eyes may look familiar, because they are a pair of extras that I have of the 8mm (AKA small dragon, kirin and griffin size) – I went nuts at a taxidermy place and I figured any extra could be used with sculpey experimenting. Here’s hoping that they take heat fine (I assume they will since they are glass).
Anyway.. here he is. Don’t scream! Right now he looks like one of those cats who doesn’t have hair… or maybe a monster from one of the Alien movies…
Oh! I also have a question for anyone who uses Super Sculpey – it came to me in a box that had no plastic around it, in a padded envelope. Is it the type of clay that never dries out, or should I put it in a sealed plastic bag for storage? This guy is in a plastic bag for tonight because I didn’t want to take any chances, but it seemed strange that they would package and send sculpey without shrink wrapping it or something :scratch:


Commission spots are currently closed! Please message me for details.
Please visit My Webpage to see my art and PYO's that I've done in the past!January 17, 2011 at 8:00 am #502260Commission spots are currently closed! Please message me for details.
Please visit My Webpage to see my art and PYO's that I've done in the past!January 17, 2011 at 2:48 pm #835890Very nice! I love the tail, reminds me of a pangolin. 🙂 Looking forward to seeing him finished!
January 17, 2011 at 5:21 pm #835891Pangolin… That’s it! I couldn’t think of the name!! He’s really neat-looking. I especially like his back scales. 🙂
January 17, 2011 at 6:23 pm #835892Nice, can’t wait to see him when your finished. 🙂
January 17, 2011 at 7:24 pm #835893cool!! i love the detailing with all the scales! i dont have that much patience. haha. about storing your extra sculpey.. i would definitely put it in a plastic bag if you arent intending to use it right away. it wont dry out solid, but i think it will be a little less easy to work with. oh, and the eyes should bake fine.. i havent had a problem.
good for you on trying something new! i have several sculpey projects sitting around that i never have time to finish. i can’t wait to see yours done!
January 17, 2011 at 7:32 pm #835894Yay! Thanks guys 🙂 Now I need to look up a Pangolin..
The eyes did bake just fine, thank goodness! Now I just need to figure out what colors to paint him..
Commission spots are currently closed! Please message me for details.
Please visit My Webpage to see my art and PYO's that I've done in the past!January 18, 2011 at 1:14 am #835895He looks great! I buy sculpey in those masive 8lb boxes and they come shrink wrapped, although left out I’ve never had an issue. It goes hard in winter though, but never dry. Just be careful about leaving raw sculpey around, I know someone left it leaning on something plastic and it corroded the plastic! So not on nice furniture or anything for sure.
Oh, and with baking, what I like to do is grab a bunch of polyfil (so either stuffing or quilt batting or something) and fill up a little tray to bed the sculpture while baking. It doesn’t melt or anything, and that way you don’t get a big flat part on the bottom where your sculpture has baked against the metal tray.
January 18, 2011 at 5:02 am #835896I made a Loch Ness monster when I was a kid out of clay . I made all sorts of stuff out of clay . Why shouldn’t we still enjoy it . Your dragon is cute .
January 18, 2011 at 8:36 am #835897Hey, thanks for the tip Scenceable! I’ll have to try that for next time. This guy’s underside looks horrible not just because of the flat baked parts, but because of all the layers I put on him and never thought to smooth out on the bottom.. and this is why I do test runs 😆
Commission spots are currently closed! Please message me for details.
Please visit My Webpage to see my art and PYO's that I've done in the past!January 19, 2011 at 5:09 am #835898I’ve so far just painted him green and given his horns and claws coats of gold. By no means is he done, but I am feeling somewhat uninspired right now, so I may have to put him on the shelf until I’m feeling it again.

Commission spots are currently closed! Please message me for details.
Please visit My Webpage to see my art and PYO's that I've done in the past!January 19, 2011 at 1:43 pm #835899Yeral, he’s coming along nice! 😀
January 19, 2011 at 2:07 pm #835900He is so adorable! 🙂 I hope inspiration strikes soon.
January 19, 2011 at 5:06 pm #835901Very cute. I love the little dew claw (or whatever you call it) up on the side of his foot. That sign of a species transitioning from four toes to three makes him look like a real creature.
January 19, 2011 at 6:31 pm #835902etruscan wrote:Very cute. I love the little dew claw (or whatever you call it) up on the side of his foot. That sign of a species transitioning from four toes to three makes him look like a real creature.
agreed! he looks fantastic so far!
-
AuthorPosts
- You must be logged in to reply to this topic.
